Monday, September 5, 2011

Carpet or Wood?

Hubby's arm is finally healed and we're back to the business of house-fixin'.   We didn't do much to the house over the summer but we did put in new carpeting in the living room.

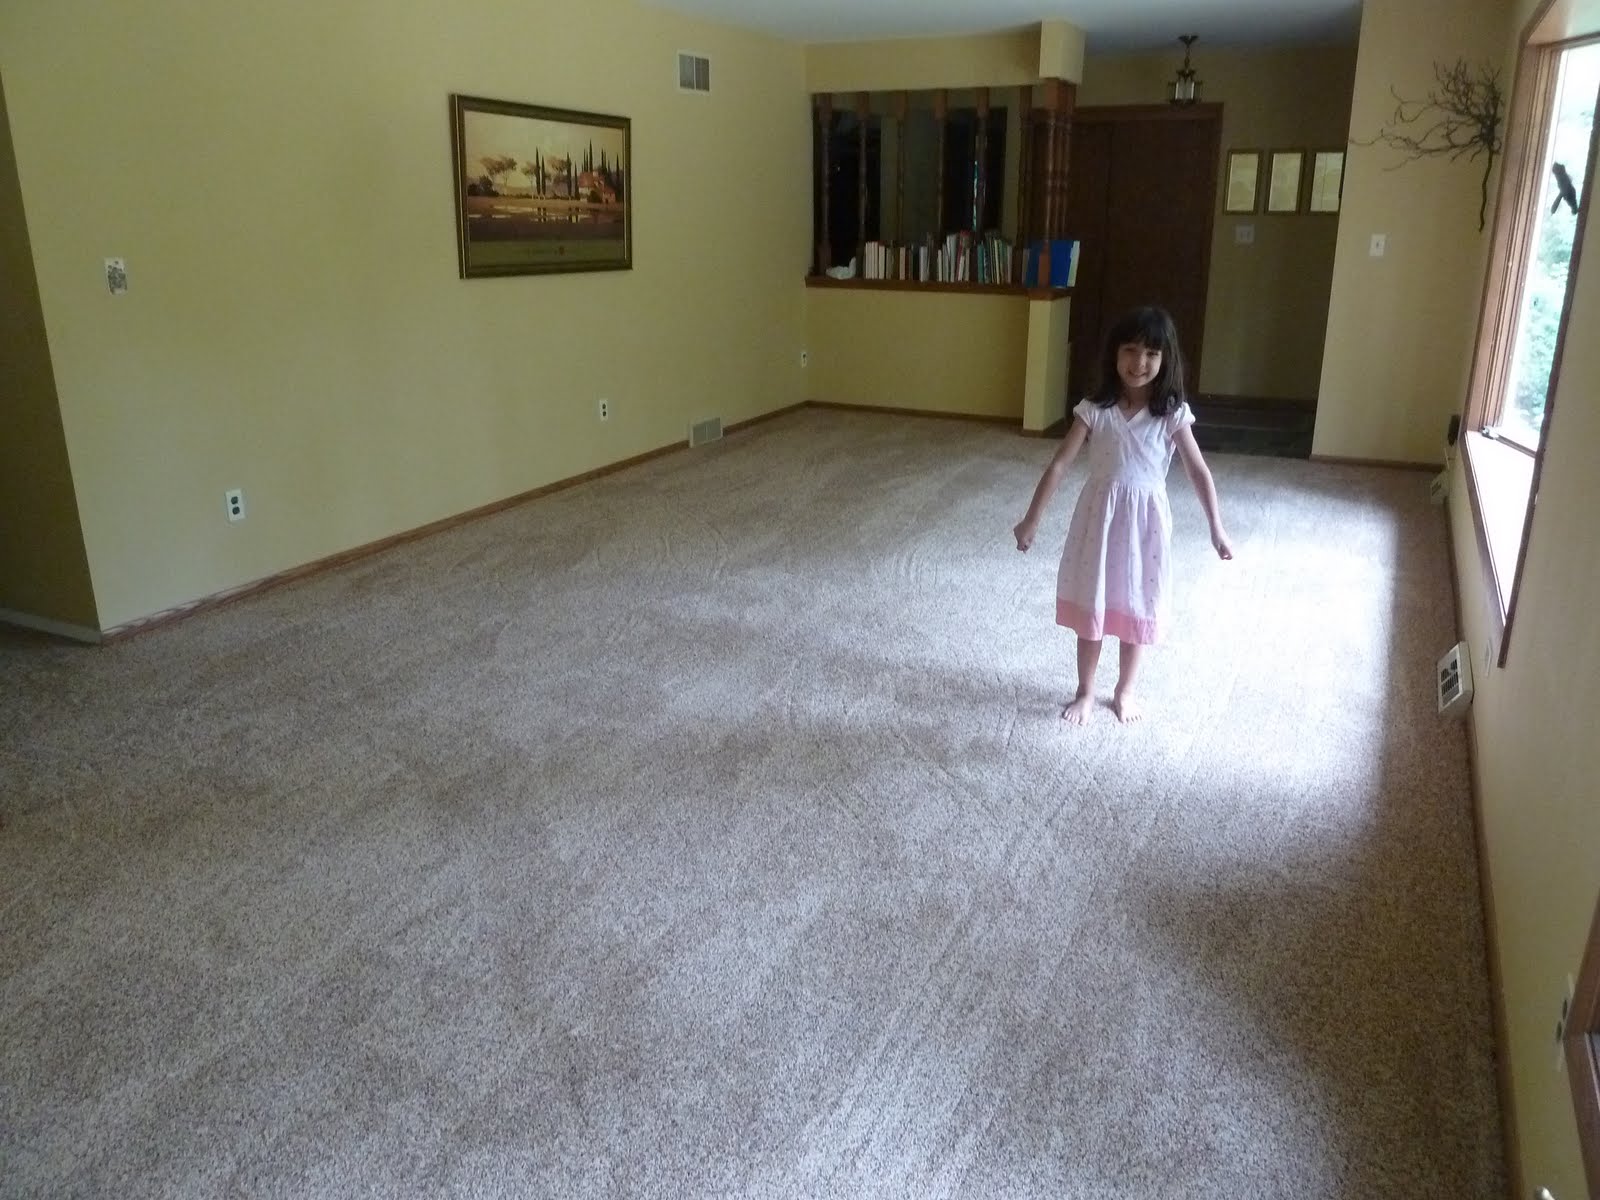
Yay!  No more worn-out, crushed and stained carpeting!
We had been debating since we moved in on whether to put in carpet or wood flooring in the living room.   Wood flooring looks great but there's a comfort factor to carpet that is tough to beat.

While we were mired in our indecision, the existing carpeting, which was already bad when we bought the place, was getting worse and worse.  There were some HUGE stains in the dining area from the previous owners that even steam-cleaning and scrubbing with various chemicals wouldn't take out.

When some friends we hadn't seen in ten years wanted to visit this summer,  I decided replacing the carpeting was priority one.  We had less than two weeks before our company arrived.  There wasn't time to put in wood flooring.  It was even a scramble to find a place that could get carpeting ordered and installed that fast.  Luckily, the local flooring store where we had bought our kitchen flooring was able to do it in time.  The big hold-up in the process was, you guessed it, choosing a carpet.

I thought it'd be a no-brainer:  Go in.  Choose a color.  Do you want loop or non-loop?  Done.  Obviously, I had never bought carpet before.

We were more concerned with matching existing flooring
that would meet up with the carpet
than matching the walls, which I will probably
repaint at some point when I'm bored with the color.
I knew there were texture differences in carpet (aka berber vs. shag) but I didn't realize there were so many categories, different types of materials, backings and face weights.   After looking at our options, we chose a casual textured carpet, which wasn't quite as plush as I wanted but was very soft and not scratchy.  We also bought the more expensive waterproof pad.

I had intended on a basic beige carpet, perhaps with two different colors of beige threads.  But I couldn't find exactly what I wanted.  In the end, we went with a peppery colored carpet, Shaw's Down to Earth in Mixed Spice, which my husband was a little uneasy about since it's not very traditional.  For me, the main selling point was that it's supposedly good at hiding stains.  And it is!  (Actually, it's too good; our cat hurled up a hairball the other day and after I removed the gooey pile of fur, I had a hard time finding the stain so I could clean it.  I had to pat the carpet by hand to find where it was wet.  Ewww...)

Flecks of bright color sort of blend and fade
when you see the carpet as a whole
The weird thing about this multi-colored carpet is that from a distance you can't see all the colors.  It doesn't look like just one color, but you'd never guess there's yellow, red, blue and green threads in there, along with beiges and black, unless you get down and examine the threads closely.  It's definitely not a look for everyone but I think it'll be a good fit for our stain-prone family.

Anyhow, back to the install, the carpet was installed and mostly aired out by the time our guests arrived and I was so happy about that!

I've already had the...ahem...opportunity to clean spots from the carpet.  The latest was a Silly Putty incident, which I was able to get out of the carpet with some Goo Gone.  I was told that newer types of carpeting shouldn't be cleaned with detergent, just steam extraction, which means we'll really be putting our steam vac to the test.

Wednesday, July 6, 2011

The Next Big Thing

It's been a while since I've had anything to post.  After we had the concrete patio installed back in June, we started on the basement. It is currently unfinished but has lots of potential. 

We drew up a floor plan, chatted with our local building inspector, had our electrician come out to assess the situation and started talking to plumbers.  Our home was built in the wild and crazy days before building to code was a necessity and our basement is lacking in some basics.  Like plumbing....any kind of plumbing.  No sump, no drain, no anything.

Having the plumbers come out was informative.  One particularly impressive plumber pointed out several flaws in our first floor plumbing and also noticed some issues with the basement.  He was astonished to see that our furnace outputs its condensation directly to the outside, not to a sump.  He was even more astonished to hear that we haven't had an issue with it freezing in the winter.  (I suppose that's something we get to look forward to. )

See that black tube on the far wall?  That's where the water
goes when our softener is flushed out.  (Definetely not to code.)
Our water softener water is also dumped outside year-round.  We were told that typically people have that waste water enter their septic all year, but sometimes, people have it dumped outside, except for the winter when it is sent to the septic.  Again, the plumbers were puzzled that it hadn't frozen.  (I admit I felt rather foolish; I hadn't noticed the rubber tubing that leads to an outside wall and had just assumed that there was a floor drain.  Now I know why there is a continually wet patch in my back yard.) 

Anyhow, another question was what building materials should we use?  We had noticed that there had been water in the basement some time in the past and had several basement waterproofers come out to look at us.  Surprisingly, despite how bad I thought things were, none of them were particularly worried.  After talking with the professionals, reading books, talking to the building inspector and surfing hours and hours on the 'net, we've decided to hold off on any waterproofing work. 


The floor plan was pretty easy to work out;
all the living space will be where are windows/outside egress
and since there's already a fireplace installed,
it was simple to determine where the main entertainment area goes.

Seriously, just to find out whether we should use plastic sheeting on the walls took days to figure out.  Every source said something different...so confusing! After that, we had to choose studs and insulation.  My husband wanted to use normal wood studs and fiberglass insulation but I feel that keeping the basement mold- and mildew-free is a priority so we decided to try metal studs and foam board insulation.  Again, so much conflicting info out there I have no idea if it's the right thing to do or not.  I guess we'll find out.

We patched some small cracks in our concrete pad and concrete block walls that the waterproofers had pointed out, and put down some of the metal track for where the interior walls will go.  We didn't get far though. 

Hubby decided to get a little crazy at a party and rolled a go-kart, busting his elbow.  That resulted in surgery and a 6 week 'no lift, no strain' command.  It was going to cost about $500 to get a sump drilled and installed into our concrete floor so he wanted to do it himself, but now we need to wait until he's healed.  With our unexpected medical bills, we need to limit remodeling costs as much as we can, meaning no hiring of handymen to speed us on our way.  So basically, other than putting in a few studs and some insulation panels, we haven't done much.  Summer just isn't the best time for a massive project.  After all, that's what a long, boring winter is for, right? 

Efflorescence on the back wall indicates moisture coming through the concrete block.

Friday, June 3, 2011

Patio Ponderings

Ridding my yard of thousands of garlic mustard
plants ready to set seed is what I did in May....all of May. 
My back really hurts.
Hey all!  It's been a while since my last post.  I've been busting my tail to get all that evil-incarnate garlic mustard pulled before it sets seed, which means anything related to the house, including basic cleaning, has been pushed to the side.  No time to blog either.  ('til now.)

Still, the month of May wasn't a total loss.  There was one house project that is now mostly completed.  I managed to hire a contractor to put in a concrete patio under our deck.  And, despite all the rain we've had, the contractor managed to install it a couple of weeks earlier than expected.  It only took his crew two days to complete the patio, which was about 540 sq. ft.

Over the winter, I had toyed with the idea of putting in a patio myself but things have been so crazy I decided to hire out the job.  (So it'd get done in our lifetime.)

Overall, I'm very happy with how it turned out.  We had a terrible time with brambles, saplings and other plants growing right up to the basement door, making it almost impossible to get outside.  And even if you did want to wander among the thorny brambles, every time it rained, dirt splashed up into the door's track; gunking it up so badly you couldn't open it.
So, I'm glad we had that space paved.  However, there were a couple of issues, due mostly to my poor communication skills and lack of help-hiring experience.  I'm not complaining; just pointing out the mistakes I made so that others can learn from them.

Watch that last step; it's a doozy!
First, I had a perennial bed close to the house.  Most people wouldn't even notice it 'cuz our yard is basically a jungle. 

I moved most of the plants I thought might be 'dozed over, but I miscalculated how much room the skid loader would need.  So, since I never pointed out the perennial bed to the contractor, my GORGEOUS Roy Davidson pulmonarias, columbine and false solomon's seal plants were gone within minutes after they started working.  Waaaah! 
Second, when my contractor had quoted the job, he had made the statement that he was going to install the patio so we could walk right out from the basement door.  It just sounded like common sense to me.  (Of course we want to be able to walk out onto the patio from our door!)  I didn't think to question it.  Turns out I should have. 

As promised, they installed the patio almost flush with the basement door, resulting in a patio so high off the ground that I'm going to have to put in steps off the end of it in order to access the rest of the yard. Also, the bottom stair step is now only a couple of inches from the ground, which looks a bit weird.

Finally, my husband told me to be sure not to pay the contractor until I verified that they completed the job correctly (duh!) and <i>also</i> cleaned up everything.  Although I scrutinized their concrete work, I only eyeballed the cleanup effort.  So now our 2nd driveway has ruts in it that were only partially filled back in.  Oops!  Guess I should have worn my glasses.
I now have to figure out where to put steps
to the rest of the yard and also how to put in a
retaining wall that doesn't detract from the round bump-out
Despite these errors, the patio looks great and I love the rounded bump-out we added on the advice of the contractor.  I wouldn't have thought to go beyond the deck myself but it is a nice touch and makes the patio more usable. The only downside is that we have to make sure our cats don't attempt to jump down from the deck.  Before they would have landed on soft dirt and plants.  Now it'd be a bone-breaker.


Tuesday, April 19, 2011

A bit of fun with metallic paint

I thought the existing hallway was too bland
Augh! What have I done? I painted an accent wall in my hall today and I can't decide if I like it or hate it. Also, since I had some leftover paint I painted some trees on the other walls. 
Why did I do this, you ask? Well, maybe days and days of icy rain and cold has finally driven me mad. After waking up to another yucky gray day here in Wisconsin, I was looking for something to do that would shake away the blah's and anxiety I've been feeling the last couple of days. Voila! A trip to Menard's to pick up basement remodeling supplies and what do I see? Funky metallic paint on sale with a rebate too! Just the kind of fun, small project I needed.

We have a long, narrow hallway leading from the main living area to the bedrooms. The walls were painted a lovely cream color. Although I love the color, there's a boring element to the whole space that I just can't put a finger on. Sure, putting up some pictures or artwork is one way to make a space more interesting but the hall is such a tight squeeze that I'd rather keep it streamlined.

I read in one of my home decorating books that painting a darker color (or a vibrant interesting color) on the end wall of a long narrow space helps visually shorten and broaden the area. On our end wall, we had a nice mirror that I had bought a long time ago at one of those strange liquidator stores.  It looked good but didn't do enough to liven up the hall.
I recently moved the mirror to our garage entryway to help lighten up that dark corner and then looked for months for a similar mirror to put back in the hall but couldn't find one. I ended up buying a simple, unframed, beveled mirror that just looks too plain for such a plain space.

When I saw the Rustoleum Metallic Accents at the store, I figured that I could kill several birds at the same time by painting the hallway's end wall with some nice metallic paint: "framing" the new mirror, visually modifying the space and giving the area a bit of interest in one fell swoop!

Even with light from the bedrooms the hall is always dark
 and if all the doors are shut it's a cave
But what color? There were several that I really liked. It had to be a color that wasn't too dark, which was too bad because the color my husband and I liked the best was reddish brown "Warm Copper."

I first chose a light green but when I got it home I noticed the silvery hints in the color weren't what I wanted. I then chose "Soft Gold" which seemed like the right choice until I got it on the walls.
I don't usually tape off walls I'm painting but it was such a narrow space I ended up taping it all off. The instructions recommended rollers instead of brushes and they are right, it looks best rolled. The paint doesn't have very good coverage and so two coats were needed. In some spots I did three.
You can see how the metallic paint
shows every inconsistency in the wall's texture
Well, I don't know if I grabbed the wrong can of paint at the store but the color is not what I was expecting. "Soft Gold" is way darker and golder than I thought it would be (I guess that's why they sell those samples) and it's so metallic. I thought I'd like that effect but up close I noticed that it shows every flaw and texture variation in the wall, which isn't good because the hall's end wall has plenty of flaws.

I should have stopped there but then I painted some trees along the length of the two side walls.  I used painting tape and a level to make sure the trunks would be straight and that they would all be approx. the same height and width. 

The metallic paint catches the light giving them an interesting ombre' effect.  Still, I should have worked out what kind of tree I wanted to paint before I started.  Instead of beautiful airy saplings, I got something that looked stenciled and stiff (and suspiciously like something that would be stitched on a colonial embroidery sampler.)

So, the lessons I learned include the following: One, buy the paint sample first and try it before you buy the big can. Second, paint is always darker and more intense when massed on a wall versus the little paint chip. Thirdly, if your wall is flawed, metallic paint is probably not a good choice.  Oh and the last lesson, the little quart jars of paint are really tippy. (I knocked over the open jar twice and spilled at least half the paint on the tarp before I had even started painting.)
The one thing I thought turned out well was painting the light switch to match the accent wall. I spray-painted the switch and then I lightly sanded, brush-painted and textured the switchplate. Oh, and I should tell you that painting the end wall in a long room really does make the room seem wider and shorter. 

I guess I'll try to live with it for a while until my husband doesn't remember me buying the paint anymore.  Then, I'll either love the new look or I'll repaint the end wall with a cream color (non-metallic) a shade or two darker than the side walls, and either paint over the trees leaving the walls bare or try another image. Something more organic in form, like willows, grass, a swirling line of leaves or maybe just a wavy line.

Feel free to let me know what you think of the wall and trees and if I should undo what I did or keep it.


Saturday, April 16, 2011

Dream Deck Not So Dreamy

Our newly painted deck and the
portable chaises that are part of my deck dream
One of the reasons we bought this house was because of its deck, overlooking the woody wilderness that is our backyard. It runs the length of the house and there are two patio doors that open on to it, one from the former den (now part of the kitchen) and also one from the master bedroom, which I thought was REALLY cool.

I envisioned peaceful mornings slipping from my bed, sliding open the patio door to a chorus of birdsong and sunshine, and relaxing on a chaise before the rest of the house wakes up. (It hasn't actually worked out like that but in theory, it could.)
Supposedly the previous owners let their dog use the
deck as a potty in the winter, wrecking the stain job
The deck certainly wasn't one of the things we thought we'd have to tackle right away but it was. Turns out my youngest could easily fit through the railings, which she delighted in demonstrating to me as I hyperventilated in fear (it's a two-story drop). There was also a gate blocking access to a steep staircase but it turned out to be rotted and broke away when we tried opening it. And that wasn't the only rotted wood either; there were several floor boards that were rotted too and the paint/stain was chipped, bubbling and generally missing from action in large spots.

We referenced the state building code when
determining how close to place the new spindles
Fixing the deck railings became priority number one. Not only were they spaced incorrectly but many were also bent or otherwise damaged. We took almost all of them off, and put new spindles on. It ended up being much more time-consuming than we expected. My husband had to miter the tops of the new spindles to match the ones we kept and it was difficult connecting them while hanging off the side of the deck. Still he got it done and even the smallest tot won't be able to fit their head through.


Originally, only the inside of the deck was painted,
which looked pretty bad from the yard

We then hired a contractor to power wash it, hoping to strip the old stuff away. Instead, it put big gouges in the wood and also stripped some stain from our siding as well. Our painting contractor told us you NEVER try to strip paint from wood by power washing it. Lesson learned.

Anyhow, the deck was strangely painted only on the sides you could see from inside the house, leaving the rest of the wood exposed to the elements. According to the same painter, if the wood is gray/bleached, that means the cells are dead. Still he said that the deck wasn't in too bad of shape; we replaced the rotted boards and he re-cleaned the deck and prepped it for staining.

We chose Sherwin Williams "Monterey Tan" solid color stain because I thought it would like nice with the grayish green trunks of the trees. It took two coats to cover the previous color, "navajo red," and this time the painters painted the outside of the deck as well as the part you could see from the house.

Now we only need to fix the gate and then I can let the cats and or small nieces/nephews out on the deck without fear of losing them over the sides or their heads getting stuck between the rails and having to saw them out (don't laugh; it happened to my mom when she was little...ok, you can laugh). The painter said the stain we used will last 8 years so I marked my calendar for five years to repaint. Now on to the next crisis!

Friday, April 15, 2011

Cat Door and Other Little Things


This particular cat flap isn't very big but
our large kitty has no problem using it;
it also has a locking feature which is a nice feature

We all know that sometimes little changes make a big difference in how we live, right? Well, this year we've made a few and their impact has been mighty indeed. 

This past fall we acquired a feral kitten found by my parents. Having a cat again was nice but we had no good place to put a litter box. We had it in our kitchen and our cat would track litter all over the floor so it was gross and unsanitary.  Also, our kitty didn't like scented litter so there was a continual unpleasant smell hanging in the air.  We needed to come up with a plan. 

For less than $15 I was able to get a cat door from Amazon.com. I wasn't nervous about cutting into the door leading from the kitchen to our basement because the previous owners' dog had scratched it up pretty good.   The cat flap was easy to install and it took only one day for the cat to start using it on his own. Now instead of having a smelly cat litter box under foot it's tucked away downstairs.

Before I organized our supplies, it was just in a big pile
in the cabinet and we couldn't find anything
without making a mess
Another small change that has really helped was finally organizing our bathrooms. I bought a different colored set of washcloths for each family member and cleared out any old personal hygiene products. I grouped the remaining supplies and put them in various see-through containers with labels.

Wal-mart sells sets of multi-sized clear plastic containers for a few bucks so we used those and those $1 shoe boxes for most of the stuff.  Our most expensive container was maybe $5 (not including a lovely pot I bought from a pottery studio which currently holds my hair bands). 

I also found small pots and vases at Goodwill that work great for holding toothbrushes, toothpaste, hair brushes, hairbands, etc. 

I figure it took a couple of days of shopping and scavenging to gather my containers and a day to clear out and group our supplies.  Doing this has really helped streamline getting people out of the house each day. It's also cut down on us buying duplicate products because now we can see what we have (for example I found 10 tubes of antihistamine lotion and 13 little tubes of toothpaste that you get at the dentist).

Teddy Bear helping me file
I was so pumped about organizing our bathroom vanities that I decided to tackle our office too.  We had filled up our existing file cabinet and were just cramming additional files wherever I could find a spot. I found a large heavy-duty file cabinet on Craig's List for $10 (they are several hundred dollars new) and have been filing and tossing papers like a mad woman ever since. I've also cleared out our office supplies the same way I did the bathrooms-tossing out as much as I could and putting the rest in labeled clear-plastic containers. I was shocked at how many binders and half-filled notebooks we had lying around the house.  This was a bigger project so I broke it down into several couple-hour sessions.  I didn't want to get overwhelmed and give up.

For years we've been living in confusion and clutter.  With these few small changes, which didn't take much time or money, I feel a bit more carefree and our house isn't as crazy as it used to be. 

Monday, April 11, 2011

Unexpected Projects Throw Cheeseheads into Chaos

Our rotting pergola: looks like a bat condo, doesn't it?

 Aargh! Very frustrated today. Found out the cupola on top of our garage is rotted out and needs to be removed or replaced. Also found out that at least half and maybe all of our gutters are also rotted and need replacing asap because they are damaged our soffits. I can already tell we are going to blow this year's home remodel budget sky high!

It's funny because I've just been reading about entropy (how the universe becomes less ordered) in a book on quantum physics that I've been using as a sleep aid. It takes mere minutes to knock me right out when there's talk about how to measure different amounts of infinity or a discussion on the different types of multiverses. I am only able to get through a few pages at a time before shutting down so this one book should last me for months.

Sorry, back to the entropy happening in my home. So, I'm not too freaked out about the cupola. After all, I'm trying to give the house a more modern look and getting rid of that will help. I don't think it has a real function but I hesitate to take it down 'cuz I just know there are bats in there. Maybe I'll hire someone to do it who has already gotten their rabies shots. (This is the same reason I haven't taken down the shutters yet. I get that bats are really good for insect control but they seriously freak me out!)

The rusty holes indicate the gutters need replacing
As for the gutters, if they all need to come down, I could have something other than white trim, which would be nice. Except I'd still want the white soffits for bringing light into our home. So, I guess I can stick with white trim. Painting a house in three colors is more expensive than painting in two, which I don't quite get. After all, it'd be the same amount of paint, right? It's just frustrating because I want to get the house painted as soon as possible and now this will have to be taken care of before we paint. Why can't things ever be simple?
I have to remember that it's not all doom and gloom. After all, I did manage to convince my spouse that putting concrete under our deck is a worthwhile idea. Right now it's just brambles, weeds, centipedes and dirt. The patio door is currently unusable due to all the dirt in its tracks. I suspect that all that dirt getting splashed up on our cedar siding is not good for it either.

Here's an interesting aside. I had painters come out to quote the painting job and all told me that our cedar siding is in really good shape. They said that the cedar and oak used in newer homes isn't as good as the wood used in the past and doesn't hold up to the elements as well. I wonder if this is true...

I think these look like they were once painted blue
Anyhow, with a concrete patio under the deck turning it into usable space, I think I'll use a solid stain on the underside of the deck and paint it sky blue 'cuz I heard somewhere that the practice deters wasps from building nests (probably not true but I'm willing to give it a try).

As a festive touch, I bought some colorful LED outdoor string lights to put up. The package says LED lights don't attract bugs like regular lights do but to be safe I went with a multi-colored set instead of white, which I would have preferred. I might get some good deals at the end of the summer on furniture and, voila! a festive party space!

I'm hoping the patio will also help control our centipede problem. Seriously, spiders aren't even half as creepy as those hairy, fast-moving beasties! And they get everywhere! I even found one clinging to the inside of my bath robe as I was just about to put it on! (Which one of us would have been more grossed out?)


Once this is paved, I will walk out my patio door,
sit under the pretty lights with a sangria in hand
and listen to the crickets sing
 Since we are going to be busy trying to get the basement ready for our guests this summer, we've decided to hire out the patio job. I've already got all the quotes I wanted. I thought a poured concrete patio would be more expensive than pavers but the opposite has turned out to be true. From the quotes I've received, pavers were going to be twice as much as the concrete. I love the look of pavers but I don't have any issues with the look of poured concrete either.

Stamped concrete looks nice but was about also more expensive than the poured concrete. Also, I've noticed that colored concrete looks awful once it starts losing its color. I'm all about less maintenance, so for us, the poured concrete seems like the best option.

One contractor told me that he uses straight six bag mix and that it is different than six bag mix because it contains no fly ash. I looked online to see if that was true but didn't find any useful information. I also didn't find out why fly ash is bad. Is it worth a $1000 difference in price? I don't think so.

Anyhow, although stressing about the added repairs we have to complete this summer, I am happy that I was able to talk hubby into the concrete patio. Yay!