Thursday, May 14, 2020

Update on Mini Dance Floor

Wow!  Never expected such a small, spur-of-the-moment project like a mini dance floor would end up being so important to my family's well-being!

Not long after we finished the floor, the coronavirus pandemic started and all of my kids ended up back home.  One had been studying in Spain right when Spain's coronavirus cases were spiraling up, so we all decided to self-quarantine as a family.  Soon after, our state implemented its stay-at-home order with no end date announced.  That's when the dance floor went from being a fun extra to a vital part of our quarantine routine.

Since the gym isn't an option right now and Spring in Wisconsin isn't known for its great weather, having a space for exercise has really come in handy.

One of the dance classes we normally take at a dance studio went to online classes.  For a different dance class we do, the instructor sent videos and asked us to keep practicing for a (hopefully) upcoming summer recital.  The kids' university-sponsored exercise classes also went online.  We were surprisingly able to get FIVE people on the dance floor doing Zumba at one time!  (Won't be posting video of that; it wasn't pretty... Zumba is hard.)

We had a local company install mirrors and we were super happy with the results.  The installers did a great job.  It was totally worth the money. The mirrors themselves are frameless with a polished, not beveled, edge so there's little distortion along the seam. They have a special mastic behind them for support and are also on tracks.  The tracks are much thinner than I expected and blend well with the mirror.  You don't even really notice they are there.  (FYI: mirrors really help a person keep track of their body position in yoga.  My downward dog has definitely improved since their installation.)

In summary, this small project has yielded big results for my family.

Friday, February 7, 2020

Mini Dance Floor

Many empty nesters want to downsize at some point.   I know I too want to downsize at some point. Starting the process seems pretty overwhelming, especially because my spouse and I can be a bit...ahem...hoarder-y.  Even when we do get rid of something, something else always manages to take its place.  Our latest addition is a mini dance/yoga floor we built ourselves.

It's not very large, but it's big enough for two people (and their two cats who like to rip up yoga mats) to stretch, do yoga poses, or practice some fricking awesome dance moves.  The floor wasn't very expensive or hard to build. The best part of this micro project was that it used up some laminate flooring we had been storing for years "just in case."

So, the laminate flooring was leftover from when we replaced our kitchen flooring back in the day.  I never looked at the condition of the planks; if I had I would have thrown it all out long ago!  Most of it was scratched, chipped, or cut in a way that it couldn't be reused, but we luckily found we had just enough to do an 8'x12' floor.

It was pretty easy...2 layers of subfloor laid out in an overlapping pattern so the seams weren't on top of each other.  Some leftover laminate floor padding and the laminate floor planks on top of that, finished with  "L" moulding stained to match the floor.  Our only difficulties were finding the right sized moulding, matching up the grain patterns of that moulding in a harmonious way, and getting nice, tight seams on the joints.

We even ordered a tiny sound-activated disco light which flashes wild color patterns of light on the floor and walls in time to music or voices.

Now we just need some mirrors on the walls and we are good to boogie our nights away!


Thursday, January 16, 2020

KEEPING THINGS COZY

Our very 70s entryway (with shoe clutter)

Today's chilly temps have me thinking about fireplaces.  Warm, cozy fireplaces that make winter in Wisconsin bearable.  Our home already has two wood-burning fireplaces and we recently added an electric fireplace in the living room.  It's the fireplace we now use the most.  'Cuz all you have to do is flip a switch and there's instant heat!  We love it and our cats love it too.

Best of all, it helped solve a problem with our front entry.  The original half-wall in the front entry was really dated-looking, with dark wood spindles. Overall, it made the front entry look cramped and unwelcoming.

It also jutted out into the entry and it's "L" shape left an awkward space in the living room that was hard to work with.  

Our desk fit just fine but it wasn't a good spot for a work space
Our big disappointment was finding that the natural slate floor didn't cover the entire entry, which meant we couldn't move the wall without replacing the slate tiles already there.  We knew we didn't want to replace the floor due to budget constraints and since we were unable to locate affordable matching tiles to expand the floor, we decided to keep the half-wall where it was.  That definitely sucked, but after tossing around some ideas (including making it a built-in seating area with storage), we saw electric fireplaces on sale in a sales flyer and it just clicked.   A fireplace in the living room would be awesome and would give the half-wall a reason to exist!

We ripped out the half-wall (spindles and all), finding some long-dead desiccated mouse carcasses in between the studs.  Ew!  We put in a new half-wall, faced with stone veneer, topped with a lovely stained wood top made by a friend.  Yes, it still cuts into the entryway space, but visually, it doesn't look as dark and confined as it did before and I like how the stone veneer echoes the colors of the slate floor.

We didn't center the fireplace insert so you could have nearby seating without blocking the heat flow
It's probably not even a real issue but I was worried about heat buildup in the wall. Just to be safe, we installed a vent on the other side of the wall, spray-painting it so it blends with the stone veneer.  We now use this fireplace a lot, way more than the other fireplaces.

The final project for this is a custom-made narrow bench with shoe storage for the backside of the half wall to tackle that clutter in the entryway.


Wednesday, January 1, 2020

Happy New Year 2020!

Looking forward to a better year!  Here's a small project we did to save a mirror in our powder room.  The etching wasn't as hard to do as I thought, but I hadn't thought about how to wash off the acidic paste afterwards without damaging anything.  That was a headache but we managed it.

Damaged silvering on the back of the mirror at the bottom.   


I scraped off the bottom inch and acid-etched cattails on the front. 
So happy with the results!


Tuesday, February 19, 2013

Ping Pong, Piano and Movies: Love Our Basement!


Yay!  Our basement is now a useable space!
Oh my goodness!  I haven't posted since November?  Well, I guess I'd better catch you up on things.  The basement is mostly done.  We've still got some details to take care of but it is useable and so far we haven't found too many screwups. (I'll blog about those later...)

We are really happy with how it turned out.  Our carpenter did a really nice job with the post covers.  He mitered the lengths so it looks like a solid piece of wood.  The only issue is that the posts have sharp edges that would really hurt if someone bumped into them.  Luckily all of our kids are older now so I don't have to worry about toddler head injuries!

The kids wanted to keep it like this-no furniture, just open space
It took FOREVER to sand, stain and seal the woodwork.  Did I mention previously how poor the workmanship was on the Mastercraft doors we got from Menard's?  Maybe it was just a bad batch?  We've gotten Mastercraft doors before that we were really happy with but this time they were awful.

Our poor-man's home theater set up...looks silly, works great!
One of our design flaws was that we didn't extend the wall far enough past the fireplace.  There was a reason why we did that but the result was that there just isn't enough seating space.  So, we put together a poor man's home entertainment area.  It looks ridiculous but it's really comfy and uses some couches and a wood platform I didn't know what to do with.


Hopefully this works to cut down on the furnace noise...
Now it's just a matter of handling the final details.  My husband kicked some DIY booty this past weekend, insulating the furnace room in an afternoon.  Haven't tested it out yet to see if it makes a difference though.

I still have to find a sink for the bathroom and a cat door for the furnace room so the kitties can access their new litter box location with ease.

Thursday, November 15, 2012

Bathroom Tile Bliss

So very happy with how the tile in the basement bathroom is turning out.  It's all cut and laid; just need to grout it, put up the door and closet moulding, and then our contractor will finish up with the tile trim.

I'm particularly thrilled because I'm the one who picked the tile and decided how I wanted it laid out--my husband said I could do what I wanted.   I found some 18" tile from HOBO on clearance I really liked--it had a rough texture (I avoid smooth tile on the floor because of the slipping hazard), was neutral in color, and was large so we wouldn't have a lot of grout to maintain.  I wanted them installed diagonally because I read somewhere it helps liven up small spaces.

Then, several months later I found some bullnose tile while cruising Menard's that would make great trim in the bathroom.  Bought a sample, confirmed it would coordinate with the tile we already had, and then proceeded to buy 6" tile of the same type because I liked it so much.  I screwed around with the layout and decided on a pinwheel pattern laid on the diagonal.

Because the space was so small I was worried our contractor would have trouble with the pattern but he didn't.  Day 1 he cut the tiles.  Day 2 he laid them.

The 6" tile was a particular challenge because even though I hit 3 different stores to cherry pick the tiles with the most apparent streaks I couldn't find enough so I had to buy some that were plainer.   I figured it wouldn't matter if they were under the toilet, in the closet or under the vanity so I sorted them into two piles at home, "more streaky" and "less streaky" and also left instructions for our contractor, Dan, to use the streakiest tiles in the visible area of the floor and use the others where they wouldn't be easily seen.

Too bad putting in the floor mat under the tile didn't work out as well for us.  I think I mentioned in a previous post that we had installed a floor heating mat under the tile.  Turns out we screwed up somehow and didn't realize it until the concrete leveler was put on.  The heating mat works but doesn't warm up enough.  We don't know if we put down too much leveler or something else, but it might be because we didn't insulate under the mat.  The instructions that came with the mat didn't mention insulating underneath the mat but was mentioned in some forums on the internet that I searched after we realized the mat wasn't warming the floor like we wanted.  Our electrician double-checked the electrical connection so we know it's not that.  Anyhow, I called the manufacturer's tech support and they said that performance would vary depending on the temps outside, etc. and since we didn't insulate under the mat, there might just be too much concrete to heat during a Wisconsin winter.

We suspect that even if we chose a different brand, we wouldn't see an improvement in performance so decided it wouldn't be worth the cost and hassle of tearing it all out.  Although I really like the idea of heated tile floors it's not the end of the world if we end up not using it.

I'll post again once the grout is in and the trim is on.


Wednesday, November 7, 2012

Teen Weirds Out Parents With Black Ceiling

Used satin instead of flat on the ceiling on
purpose to bounce light around but it doesn't help much
As promised,  here are some pix of our teenager's room and future guest room.  Yes, the ceiling is black too.    To offset the darkness of it, we used a satin paint so light would bounce rather than be absorbed and put in mirrored closet doors instead of wood.

The mirrored doors also help bounce light around 
I'm guessing you think we are crazy for painting the room black but I made a deal.  The deal was that my teen could have a black room but would have to repaint the whole room, including the ceiling, before leaving for college.  That meant the stripes had to be painted very carefully so little to no sanding would be needed later on.  It also meant I had to say no to painted stars on the ceiling.  No one wants to have to sand down and re-texture a ceiling.  If stars are necessary I believe there's some kind of fluorescent tape used backstage at theatres that we could use to get the same effect.  Forgot what it's called though.


We used leftover paint from other projects to paint the stripes
Don't give away my secret, but I kind of like the wavy stripes and how the mirrored doors distort them in the reflection.  Officially though, I'm complaining about the whole darn concept, which of course, just makes it more precious to my kid.  And when the thrill of not being able to see anything in the room, even during the day, wears off, I will not say "I told you so!"

Tuesday, November 6, 2012

Basement SO Close to Completion!

Yeah, we know this was a stupid
thing to do.  No one got hurt.
Bad.  Bad.  Bad.  We've been so busy on the basement remodel that I totally forgot about blogging about the work in progress.  Yes, we hired out the drywalling and general carpentry work, but there was still a lot for us to do, which I didn't expect, including my husband helping with the electrical. So far I'm really happy with what's been done and am really excited to finish this project.

Overall there weren't too many problems but a few unexpected things occurred that made me really glad we hired professionals.  One of those things was our stairwell.  I had always wondered why the outer walls in the basement had been drywalled but the stairs were 1/2 drywall and 1/2 paneling.  Didn't take long to find out why.  Turns out a support beam was placed too close to the stairs and that meant that our drywaller had to bend the wall to fit past the beam.  I really didn't think he'd be able to do it but he did and it's not even noticeable unless you know what to look for!  Yay for knowledgeable craftsmanship!

Yep, that beam is right up to the stairs-I still don't
know how our contractor got drywall in between there!
Another issue was our inability to connect a switch from the top to the bottom of the stairs.  This has not been solved to my satisfaction but for now we have a motion-sensor switch at the top of the stairs and are thinking of  a motion-sensor nightlight for the bottom of the stairs.

Currently my husband is trying to figure out what's going on with our in-floor heat in the bathroom.  It just isn't heating up adequately and we haven't been able to figure out why.  This was the big screw-up on this project.  We didn't test it before the concrete was laid over it and may end up having to take up the concrete to fix it.  Thankfully the tile hasn't been laid yet!  Makes me sick to my stomach just thinking about it!

If you look you can see the bend in the drywall
but once it was painted it was no longer noticeable
We painted the entire basement a warm white which was a really good call.  We let our teenager paint the bedroom's ceiling black which, while it looks cool, was NOT a good call.  It took three coats to look right and it sucks up all the light.  Ugh!  My kid is thrilled however. (Teens are weird.)

Fireplace framed and ready for drywall
For trim we chose Minwax's Weathered Oak, which didn't match the existing trim color but didn't clash either.  The stain brought out variable colors in the red oak trim we bought so some pieces came out reddish and some grayish.  I really do like the resulting color but it was a pain to apply when trying to get some type of standard color.  For the protective coat, we started with a paint-on poly but ended up using a wipe-on poly, which I much prefer.  It had a better finish and was super easy to work with.

Fireplace after drywall, electrical and painting
Right now we're waiting on the door we ordered to replace the broken sliding door.  Once that is in, we'll get the flooring down and the space will be usable!   We had been hoping to be done by Halloween but the outside door and bathroom flooring issues are holding us up.  Oh, and now our contractors aren't available until hunting season is finished.  (We live in Wisconsin, after all...)  So, if we finish by Christmas, I have all winter to get stuff moved down to the basement and organized.  It's all very exciting!

So, I'll try to remember to put up some pix of the finished trim and the black bedroom.  Ugh!

Wednesday, May 9, 2012

Doubling Our Space

It's strange-the original owners intended to
finish the basement but never installed a sump so that was one of the
first things we had to do
So, we've started remodeling our basement.   We've been pretty busy so we've hired out not only the electrical and plumbing but also the framing and drywall work.  Since we aren't doing the work ourselves, there's not much to blog about.  I will mention cabinets though.  We just need a small vanity for the bathroom but finding one turned to out be rather hard.  The local cabinet maker who did our kitchen cabinets wasn't very interested in such a small job and the stuff from Home Depot and Menard's was surprisingly limited and poor quality for the price.  I was thinking Ready-To-Assemble might be a better deal but the shipping cost for one cabinet really jacked up the cost.   I found a company that makes bamboo cabinets out in California, Laguna Bamboo, that had some really nice cabinets and they were willing to ship to Wisconsin, but in the end we ordered semi-custom instead.  I'm going to keep Laguna in mind though for when we redo our master bath...

We used rigid foam board to insulate the walls
and metal studs for all except the bathroom
since no walls will be load-bearing.
Oh, and we thought we were going to have to take the frame off the patio door to get the one-piece shower we ordered into the basement but it fit just fine.  We got a 36" wide unit so it was pretty small.  We had a hard time purchasing it though.  We found it on the Delta website, ordered it from Home Depot, found out HD couldn't order it because it was a Lowe's exclusive, and then got the run-around from Lowe's and Delta but finally got one after tons of phone calls and losing a couple of months in the process.  It's just want we wanted though so I guess it's all good.


The future bathroom is small but will have a sink,
toilet and shower stall

It might just be a gimmick but we figured we'd try
out the Platon sub-floor that put a small space between
the concrete and the sub-floor to keep it warm and dry.
If we're lucky it'll help with reducing radon as well.
We have about one or two more work days for plumbing and two for electrical.  We will be putting in electrical heat under the bathroom floor and an automatic humidity-sensing fan by the shower.  We also need to update our water heater to handle another bathroom and solve some problems with our existing water flow.  Once those are out of the way, it just drywall and flooring and finish work.  And then we'll have doubled our space!

Saturday, January 21, 2012

Quartz Let Me Down

There are people who don't really use their kitchens and there are those who do.  We use ours.  So when we were remodeling our kitchen, we wanted sturdy but pretty counters that could take some abuse.   We thought quartz fit the bill but now, less than a year later, we are not impressed with how they are holding up.

In fact,  I think I liked our old laminate countertops better.  I disagree with Consumer Reports and say that my laminate counters were easier to care for than the quartz.

We all know laminate can't take heat.  Turns out quartz can't either.  A couple of weeks ago I missed a trivet while setting down a hot pan.  The pan ended up on the bare countertop.  When I finally noticed what had happened and removed the pan, I noticed a sparkly, pitted ring on the counter.  It looks like the resin that holds the quartz chips together had melted away.  With laminate, heat leaves scorch marks.  With quartz it leaves sparkles.

Around the same time I found a HUGE mystery scratch near the sink.  No explanation for that one; we don't use our counters as cutting boards.  I was really shocked at how noticeable the scratch is.  Sure, our laminate had scratches, but they weren't easy to see.

I have also recently found a chip in the bottom edge of the counter above our under-mounted sink. Now every time I do dishes I worry about possible damage to the counter.  A worry I didn't have with our laminate counters.

I'll be the first to admit we are rough on our environs but that's why we went with quartz.  We bought into the hype. We were expecting an easy care, durable surface that we wouldn't have to worry about too much.  What we got is something else entirely.

Tuesday, January 10, 2012

Transition Moulding...A Small Success

Wow!  What a gorgeous day today!  I am practically giddy with how mild the weather has been lately.  So giddy that every little triumph seems extra special.  I am currently quite pleased with some transition moulding we put up over the weekend.

We needed it because the pre-existing moulding throughout the house is smaller than the moulding we used in the kitchen.  Was there a reason we bought taller moulding for the kitchen?  Who knows?  I can't remember.  

Anyhow,  it would have looked weird to butt the two sizes right against each other so we needed a transition piece between the two.   The block kind they sell at the stores would be too big and wouldn't look right style-wise.  So I talked my husband into making some himself, something that would work with the plain-Jane ranch moulding but also go with our cabinet moulding, which is a bit fancier.  

Happily, we had some leftover oak moulding from a book case he made for our previous home that would be perfect.  Didn't cost us a dime and looks pretty too!  (I wouldn't be such a pack-rat if it didn't pay off as often as it does!) 

Monday, January 2, 2012

Yay!  The holidays are over!  I'm no Grinch but I am always relieved and happy when all that craziness is over!  I wanted to tell you about a project we just completed.  It didn't take long to do but it was highly satisfying to finish it because it took care of a few things about my bedroom that were bugging me, one for almost 15 years!

What did we do?  We made and installed a fabric headboard for our queen bed.  It was so easy and totally changed how the bed and bedroom looked!

No place for a bed--wall 1: bathroom door,
wall 2: patio door, wall 3: closet, wall 4: window
About 15 years ago I wanted a headboard for our bed.  Like many young couples, we just had the bed frame, which made the bed look out of place in the large bedroom we had at the time.  When we finally shopped for a headboard/footboard my husband talked me into a wood and metal number that I didn't like.  I should have stuck to my guns-that darn bed bugged me from day one!

Fast forward a decade or so when we move to our current home, where our master bedroom is small and awkward. There's really no place to put a bed.  For a few years, we tried angling the bed, which looked dramatic but offended my husband's rigid taste in furniture placement and took up a lot of room.  What to do?    Make a bed that works with the space!

Years ago, a friend of mine mentioned that she made her own fabric-and-plywood headboard and that it was easy to do.  I figured I'd give it a try.  Originally we purchased sheathing wood because the Home Depot kid told us that's what most people who make covered headboards use.  Then we saw the "contains agents known to cause cancer in the state of California" stamp on the board.  No wonder the stuff smelled awful.  Didn't want that by my face each night!  (I digress but I love California for having all those strict labeling laws...CA rocks!)

So we switched to plywood, measured the width of the bed (60" for a queen) and cut it to size.  Laid out the upholstery fabric and foam, wrapped it over the edges, and secured it with a staple gun, making sure to double under the fabric edge so it wouldn't unravel.  I also double padded the sharp corners by back-tucking the foam. It's important to lay the fabric straight across the board so the pattern is level and not pull the fabric so tight so that the foam bulges like my fat thighs do in spandex!  Even though we were careful as we worked, it took only a few minutes to complete.

We then secured it to the wall using heavy duty picture hangers and wall hooks.  That was the challenging part.  Trying to do math and logic when you are overtired (and we were overtired) is not good.  It took us multiple tries to get the placement right and then even longer to get the board attached.  (If you try a wall-mounted headboard I recommend using larger hangers if your foam padding is thick.  We had to jury rig ours by using keychain rings to extend the hangers' reach.)

In the end, we triumphed and the headboard is now snugly attached to the wall. I'm happy to report we are already reaping the benefits.  Removing the headboard and footboard from the bed frame decreased its size by almost two feet so the room looks and feels a lot bigger.  Bonus-our down comforter looks better without the footboard 'cuz now you can see its plushiness.  (Love that plushiness!)  Double bonus-the new headboard is streamlined and fits with the calming, cozy feel I want in our bedroom.  Jackpot-it also physically fits under the window of the only wall you would logically put a bed.  No more angled space-hogging bed!

 The only issue is that old window above the bed leaks cold air like crazy; I was worried we'd be sleeping in a draft but last night was really cold and we didn't feel any air movement.  Maybe it won't be an issue after all.
Ta-dah!

Thanks, Cathy, for giving me that good idea all those years ago!  You always were a great neighbor!


Tuesday, December 13, 2011

Happy, happy holidays! 

I am SOOOOO happy and I want to share that happiness with everyone! Not only have I finished our Christmas shopping a full week early, I also finished hauling the dirt for our back yard! Yay!

The railroad-tie retaining wall we put in was supposed to be a simple weekend project, cheap and easy to install by ourselves.

A couple of weekends into it and we realized that it wouldn't be done before the ground froze.  We needed help!  Enter our handyman, Kurt.  He had it cut and installed in a couple of days, the only complication being some of our dead men were too close to the surface 'cuz my husband miscalculated how many layers we'd need.  Fixing that added a couple hundred dollars to the bill.

A week or so ago I ordered more topsoil and started hauling wheelbarrow load after wheelbarrow load to the back yard. As the weather got colder, my dirt pile started to freeze and I was really worried that I wouldn't get it done in time. But Wisconsin weather is full of surprises and I had two lovely days this week to get it all hauled and spread. Now I can hit the ground running next spring and get the grass in right away. BONUS! It's also fun to walk along the top, pretending you are on a balance beam.

So close to being done....if only I had a magic wand!
As for my neighbor who recently ripped out his railroad-tie wall, his installation of a new patio, hot tub among the aspens, and rock retaining wall turned out gorgeous! His landscape design company did a meticulous job.

I like it so much that I've decided that when our retaining wall rots out down the road, we'll replace it with a rock wall, which will add nice visual continuity to the bit of woods we share with our neighbors.

My next small project is to make a fabric headboard for my bed. Right now I have a metal-and-wood headboard and footboard that I just never liked. Our bedroom isn't exactly spacious, due to the layout and a large patio door on one wall. A low, neutral headboard that fits under the window is hopefully going to add some much-needed visual space to that room.

I probably won't blog again until the headboard is done which I doubt I'll get to before Christmas, so here's wishing you and yours a really lovely holiday season!

If you look hard enough to the upper right corner you can see the neighbor's new rock wall....love it!

Monday, November 14, 2011

This is going to be a short blog.  Wisconsinites know that you don't ignore a warm November day.  If it's nice ya gotta be out there!  (No matter how trashed the house is!)   'Cuz soon enough it's "geez, it's bleeping cold" time.

Well, today started off being one of those balmy, beautiful days.   Then the rain came.  Doesn't look like it'll last for long though, so I've got a few minutes to quickly tell you about my fun find at our local garden center.

OK, so by now, you've noticed that we start projects but tend not to finish them.  So, we've got our powder room mostly, but not quite, done.  It needed a new light fixture, among other things.


Well, after toying with the idea of making our own and searching 1000s of fixtures online, I gave up looking for the "perfect" fixture and settled for one "that'll do."  Trust me; I had given up on even finding that!  Well, luckily, I found one and even luckier, I found it on sale, which always makes me happy.  We even lucked out a third time 'cuz we were expecting installation to be complicated.  The previous owners had installed their light fixture to the side of the vanity, which looked kind of silly.  We were expecting there to be a reason for it.  You know, a vent or something preventing installation over the center of the vanity.  Turns out not only was there no obstacle, there was even the metal extensions between the studs so that we didn't have to mess around with relocating the electrical connections for the fixture.  Yay!

So, we were lucky three times in this little venture.  Who would guess I'd get lucky one more time?  I did!  I was buying some bulbs at our garden center and while waiting in line at the checkout, I happened to glance at the wall above the register and there was a metal wall sculpture that would be PERFECT in the powder room. AND it was on sale too!  I couldn't believe my luck!

Well, I wasted no time in getting hubby to hang it.  Now I just have to find a towel ring and toilet paper dispenser that'll work...

Monday, October 24, 2011

A Railroad Tie Fiasco

You ever do something to save a few bucks only to find out that long-term you've just cost yourself even more time and money?

Well, let me tell you about our railroad tie fiasco...

So, you may remember that we had a concrete patio put in last spring and, although we love it, it made an already dangerously steep hill even steeper and the dirt was starting to move away from the patio, which once winter came, would crack it apart.  In addition, my kids have been complaining about not having a level, grassy area out back for playing and so we decided to solve both problems by putting in a retaining wall.

Almost halfway done with installing
the timbers; time for the deadmen!
With winter on its way, we needed to work fast.  Although I would have preferred a stone, or even landscape block, retaining wall, those didn't seem to fit our needs.  We needed something we could put in cheap and fast, with little skill level and by ourselves.  (We have to save our pennies for the basement remodel we've started.)  Both our next-door neighbors used railroad timbers in their retaining walls, and our yard has some too, so it seemed like a nice bit of landscaping continuity if we used railroad ties.  We figured they'd be fast, cheap and easy.  (We knew they wouldn't be pretty.)

Once we had a weekend available, we did some measuring and drove to Menard's to get the ties.  What a nightmare!  Railroad ties are so heavy, my husband and I can barely lift them.  They were also too heavy for our minivan. We had to split the load so it took multiple trips.


Crushed gravel for under the timbers.  
We knew we needed to dig out a couple of inches for a crushed gravel pad.  But after my father talked to us and we did some research on the 'net, we found out we also needed to put gravel behind the ties for drainage; Because the grade was so steep, digging turned out to be a major task and took several days instead of the couple of hours I originally figured.

Our "have it done in a weekend" project was now a multiple week project.  We ordered crushed gravel for underneath the timbers and #1 size gravel for behind them, delivered to the project site.  A convenient time-saver I highly recommend.

We put down the gravel pad, and started laying the first course of timbers, which was shockingly difficult. Not only do the timbers need to be level length-wise along the wall, they also need to be level (actually, leaning a bit towards the hill) cross-wise.  The timbers aren't cut precisely so we had to use string and stakes to get the level correct.  We also had to do some much deeper digging for one section of the gravel pad because the hill was steeper in one  spot than in another.  Another week went by.

Trying to spare tree roots was a major concern while digging;
it doubled the amount of time it took to dig out the trench
When my husband tried to hammer stakes into the timbers to keep them together, we were once again reminded of what a pain these railroad ties are.  The stakes couldn't get hammered in, even with using a sledge hammer.  Our drill just wasn't cut out for the job.  So, Craigslist was called into the effort and a week later we had a drill that could handle a 1/2" bit that is 13" long.  That solved the stake issue.

Another time-drainer: we found out cutting through those dense ties was close to impossible.  My husband resorted to using a chainsaw, but even that took more time than we thought it would.

It's now been over a month since we started the wall-from-Hades project. Yesterday we had a couple of hours (before it started raining) to lay down the 2nd and 3rd course of timbers, which we did.  Today my back hurts.  Those suckers are crazy heavy.  So much for "ease of installation."

Leveling the base was a job I left to my husband
with  his awesome math skills; I stuck to the grunt work
Since the timbers are too heavy for me to work on by myself, our available work time is severely limited.   We still have two more courses to go, as well as laying the deadmen, the drain pipe and backfilling with dirt. We are moving so slowly that after our efforts yesterday, my husband called our contractor and asked if he wanted to finish the wall for us.  So much for doing it ourselves to save money.

What's worse is that I chatted with both of my neighbors yesterday.  Turns out the one with all the railroad tie retaining walls (that we can see clearly from our back yard, just signed a contract to have them all ripped out and replace them with beautiful stone walls.  The other neighbor is also taking out his railroad ties and putting in landscaping block.  So much for visual continuity.

Ugh.

Monday, September 5, 2011

Carpet or Wood?

Hubby's arm is finally healed and we're back to the business of house-fixin'.   We didn't do much to the house over the summer but we did put in new carpeting in the living room.

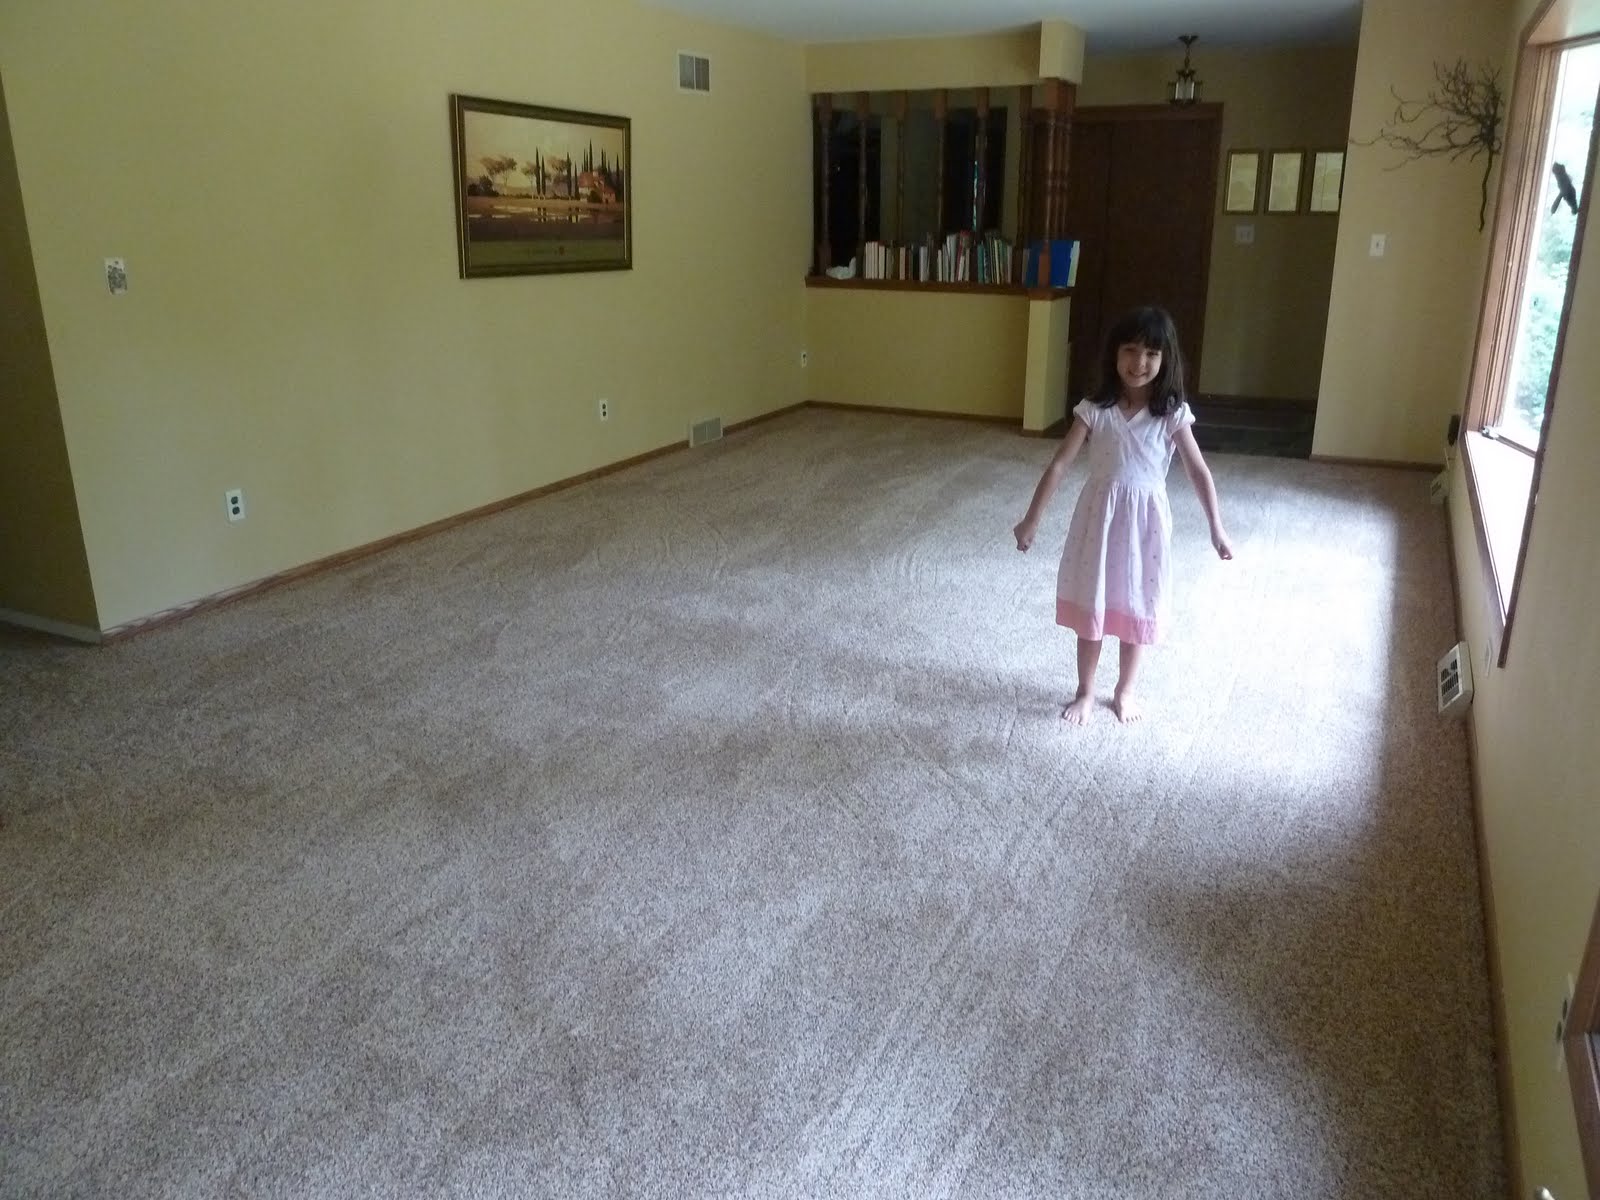
Yay!  No more worn-out, crushed and stained carpeting!
We had been debating since we moved in on whether to put in carpet or wood flooring in the living room.   Wood flooring looks great but there's a comfort factor to carpet that is tough to beat.

While we were mired in our indecision, the existing carpeting, which was already bad when we bought the place, was getting worse and worse.  There were some HUGE stains in the dining area from the previous owners that even steam-cleaning and scrubbing with various chemicals wouldn't take out.

When some friends we hadn't seen in ten years wanted to visit this summer,  I decided replacing the carpeting was priority one.  We had less than two weeks before our company arrived.  There wasn't time to put in wood flooring.  It was even a scramble to find a place that could get carpeting ordered and installed that fast.  Luckily, the local flooring store where we had bought our kitchen flooring was able to do it in time.  The big hold-up in the process was, you guessed it, choosing a carpet.

I thought it'd be a no-brainer:  Go in.  Choose a color.  Do you want loop or non-loop?  Done.  Obviously, I had never bought carpet before.

We were more concerned with matching existing flooring
that would meet up with the carpet
than matching the walls, which I will probably
repaint at some point when I'm bored with the color.
I knew there were texture differences in carpet (aka berber vs. shag) but I didn't realize there were so many categories, different types of materials, backings and face weights.   After looking at our options, we chose a casual textured carpet, which wasn't quite as plush as I wanted but was very soft and not scratchy.  We also bought the more expensive waterproof pad.

I had intended on a basic beige carpet, perhaps with two different colors of beige threads.  But I couldn't find exactly what I wanted.  In the end, we went with a peppery colored carpet, Shaw's Down to Earth in Mixed Spice, which my husband was a little uneasy about since it's not very traditional.  For me, the main selling point was that it's supposedly good at hiding stains.  And it is!  (Actually, it's too good; our cat hurled up a hairball the other day and after I removed the gooey pile of fur, I had a hard time finding the stain so I could clean it.  I had to pat the carpet by hand to find where it was wet.  Ewww...)

Flecks of bright color sort of blend and fade
when you see the carpet as a whole
The weird thing about this multi-colored carpet is that from a distance you can't see all the colors.  It doesn't look like just one color, but you'd never guess there's yellow, red, blue and green threads in there, along with beiges and black, unless you get down and examine the threads closely.  It's definitely not a look for everyone but I think it'll be a good fit for our stain-prone family.

Anyhow, back to the install, the carpet was installed and mostly aired out by the time our guests arrived and I was so happy about that!

I've already had the...ahem...opportunity to clean spots from the carpet.  The latest was a Silly Putty incident, which I was able to get out of the carpet with some Goo Gone.  I was told that newer types of carpeting shouldn't be cleaned with detergent, just steam extraction, which means we'll really be putting our steam vac to the test.

Wednesday, July 6, 2011

The Next Big Thing

It's been a while since I've had anything to post.  After we had the concrete patio installed back in June, we started on the basement. It is currently unfinished but has lots of potential. 

We drew up a floor plan, chatted with our local building inspector, had our electrician come out to assess the situation and started talking to plumbers.  Our home was built in the wild and crazy days before building to code was a necessity and our basement is lacking in some basics.  Like plumbing....any kind of plumbing.  No sump, no drain, no anything.

Having the plumbers come out was informative.  One particularly impressive plumber pointed out several flaws in our first floor plumbing and also noticed some issues with the basement.  He was astonished to see that our furnace outputs its condensation directly to the outside, not to a sump.  He was even more astonished to hear that we haven't had an issue with it freezing in the winter.  (I suppose that's something we get to look forward to. )

See that black tube on the far wall?  That's where the water
goes when our softener is flushed out.  (Definetely not to code.)
Our water softener water is also dumped outside year-round.  We were told that typically people have that waste water enter their septic all year, but sometimes, people have it dumped outside, except for the winter when it is sent to the septic.  Again, the plumbers were puzzled that it hadn't frozen.  (I admit I felt rather foolish; I hadn't noticed the rubber tubing that leads to an outside wall and had just assumed that there was a floor drain.  Now I know why there is a continually wet patch in my back yard.) 

Anyhow, another question was what building materials should we use?  We had noticed that there had been water in the basement some time in the past and had several basement waterproofers come out to look at us.  Surprisingly, despite how bad I thought things were, none of them were particularly worried.  After talking with the professionals, reading books, talking to the building inspector and surfing hours and hours on the 'net, we've decided to hold off on any waterproofing work. 


The floor plan was pretty easy to work out;
all the living space will be where are windows/outside egress
and since there's already a fireplace installed,
it was simple to determine where the main entertainment area goes.

Seriously, just to find out whether we should use plastic sheeting on the walls took days to figure out.  Every source said something different...so confusing! After that, we had to choose studs and insulation.  My husband wanted to use normal wood studs and fiberglass insulation but I feel that keeping the basement mold- and mildew-free is a priority so we decided to try metal studs and foam board insulation.  Again, so much conflicting info out there I have no idea if it's the right thing to do or not.  I guess we'll find out.

We patched some small cracks in our concrete pad and concrete block walls that the waterproofers had pointed out, and put down some of the metal track for where the interior walls will go.  We didn't get far though. 

Hubby decided to get a little crazy at a party and rolled a go-kart, busting his elbow.  That resulted in surgery and a 6 week 'no lift, no strain' command.  It was going to cost about $500 to get a sump drilled and installed into our concrete floor so he wanted to do it himself, but now we need to wait until he's healed.  With our unexpected medical bills, we need to limit remodeling costs as much as we can, meaning no hiring of handymen to speed us on our way.  So basically, other than putting in a few studs and some insulation panels, we haven't done much.  Summer just isn't the best time for a massive project.  After all, that's what a long, boring winter is for, right? 

Efflorescence on the back wall indicates moisture coming through the concrete block.

Friday, June 3, 2011

Patio Ponderings

Ridding my yard of thousands of garlic mustard
plants ready to set seed is what I did in May....all of May. 
My back really hurts.
Hey all!  It's been a while since my last post.  I've been busting my tail to get all that evil-incarnate garlic mustard pulled before it sets seed, which means anything related to the house, including basic cleaning, has been pushed to the side.  No time to blog either.  ('til now.)

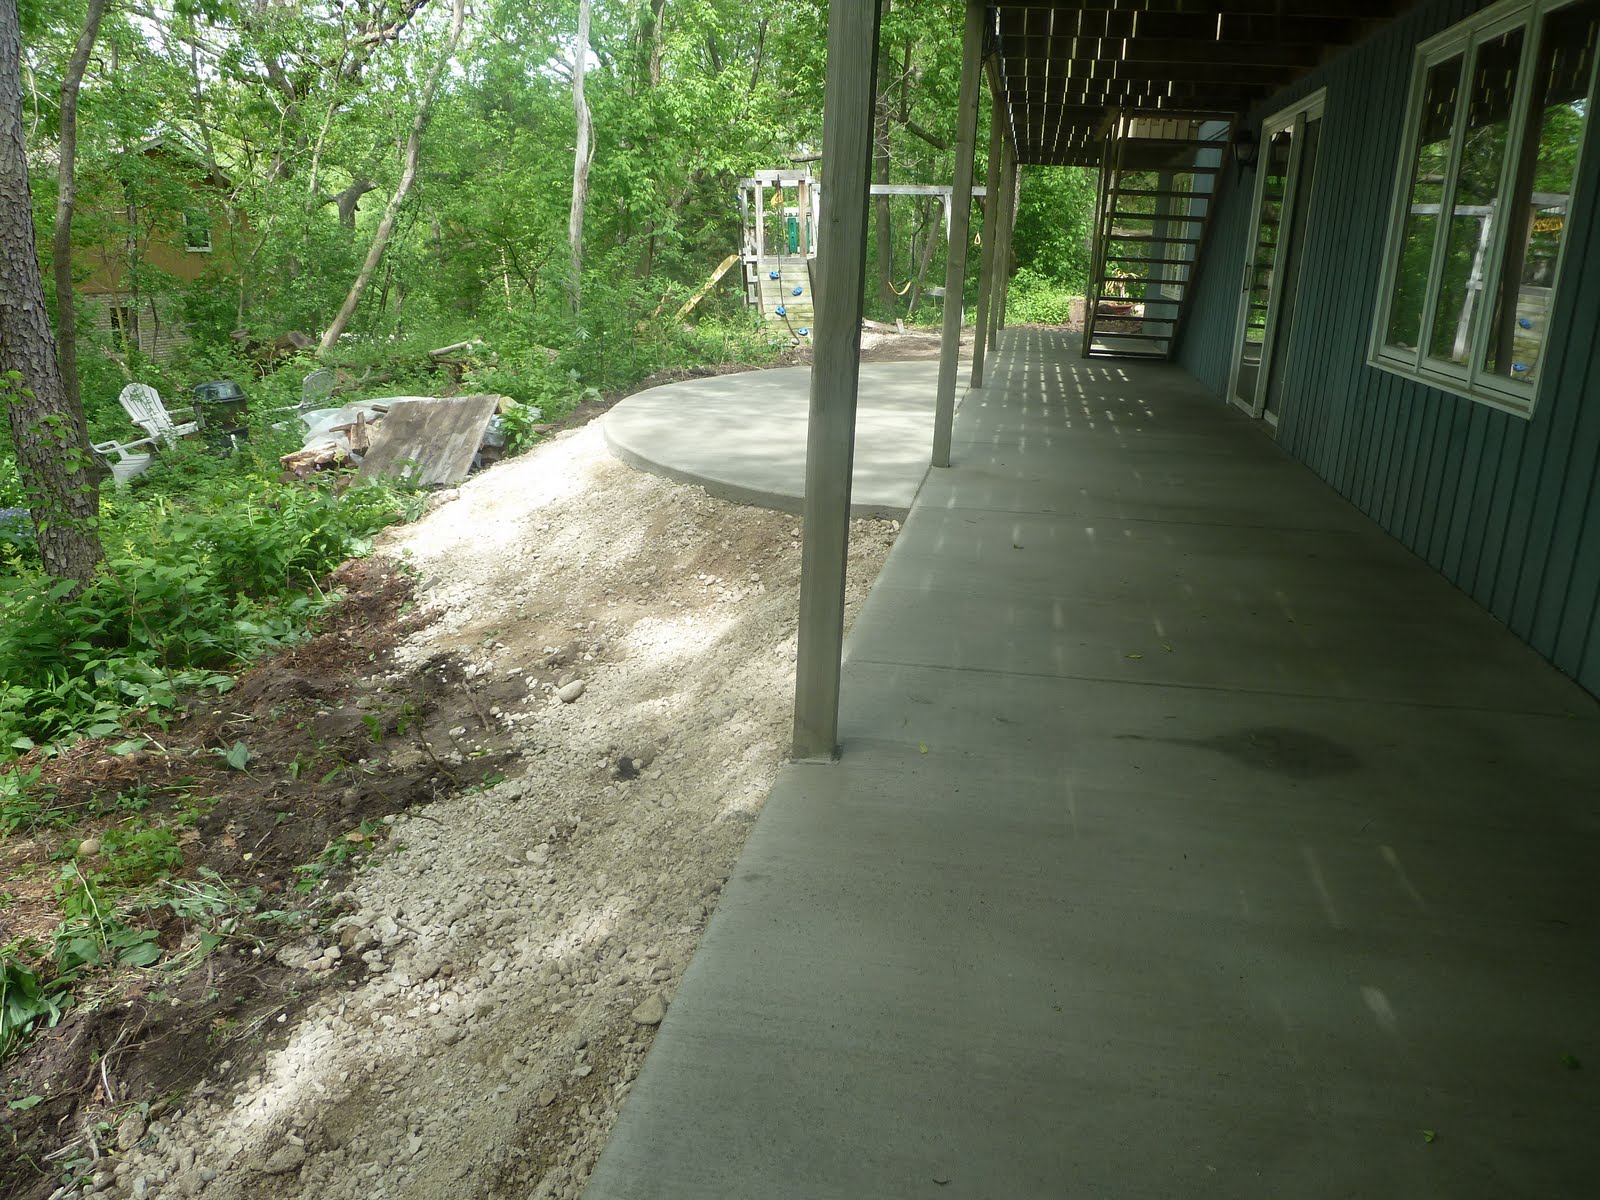
Still, the month of May wasn't a total loss.  There was one house project that is now mostly completed.  I managed to hire a contractor to put in a concrete patio under our deck.  And, despite all the rain we've had, the contractor managed to install it a couple of weeks earlier than expected.  It only took his crew two days to complete the patio, which was about 540 sq. ft.

Over the winter, I had toyed with the idea of putting in a patio myself but things have been so crazy I decided to hire out the job.  (So it'd get done in our lifetime.)

Overall, I'm very happy with how it turned out.  We had a terrible time with brambles, saplings and other plants growing right up to the basement door, making it almost impossible to get outside.  And even if you did want to wander among the thorny brambles, every time it rained, dirt splashed up into the door's track; gunking it up so badly you couldn't open it.
So, I'm glad we had that space paved.  However, there were a couple of issues, due mostly to my poor communication skills and lack of help-hiring experience.  I'm not complaining; just pointing out the mistakes I made so that others can learn from them.

Watch that last step; it's a doozy!
First, I had a perennial bed close to the house.  Most people wouldn't even notice it 'cuz our yard is basically a jungle. 

I moved most of the plants I thought might be 'dozed over, but I miscalculated how much room the skid loader would need.  So, since I never pointed out the perennial bed to the contractor, my GORGEOUS Roy Davidson pulmonarias, columbine and false solomon's seal plants were gone within minutes after they started working.  Waaaah! 
Second, when my contractor had quoted the job, he had made the statement that he was going to install the patio so we could walk right out from the basement door.  It just sounded like common sense to me.  (Of course we want to be able to walk out onto the patio from our door!)  I didn't think to question it.  Turns out I should have. 

As promised, they installed the patio almost flush with the basement door, resulting in a patio so high off the ground that I'm going to have to put in steps off the end of it in order to access the rest of the yard. Also, the bottom stair step is now only a couple of inches from the ground, which looks a bit weird.

Finally, my husband told me to be sure not to pay the contractor until I verified that they completed the job correctly (duh!) and <i>also</i> cleaned up everything.  Although I scrutinized their concrete work, I only eyeballed the cleanup effort.  So now our 2nd driveway has ruts in it that were only partially filled back in.  Oops!  Guess I should have worn my glasses.
I now have to figure out where to put steps
to the rest of the yard and also how to put in a
retaining wall that doesn't detract from the round bump-out
Despite these errors, the patio looks great and I love the rounded bump-out we added on the advice of the contractor.  I wouldn't have thought to go beyond the deck myself but it is a nice touch and makes the patio more usable. The only downside is that we have to make sure our cats don't attempt to jump down from the deck.  Before they would have landed on soft dirt and plants.  Now it'd be a bone-breaker.


Tuesday, April 19, 2011

A bit of fun with metallic paint

I thought the existing hallway was too bland
Augh! What have I done? I painted an accent wall in my hall today and I can't decide if I like it or hate it. Also, since I had some leftover paint I painted some trees on the other walls. 
Why did I do this, you ask? Well, maybe days and days of icy rain and cold has finally driven me mad. After waking up to another yucky gray day here in Wisconsin, I was looking for something to do that would shake away the blah's and anxiety I've been feeling the last couple of days. Voila! A trip to Menard's to pick up basement remodeling supplies and what do I see? Funky metallic paint on sale with a rebate too! Just the kind of fun, small project I needed.

We have a long, narrow hallway leading from the main living area to the bedrooms. The walls were painted a lovely cream color. Although I love the color, there's a boring element to the whole space that I just can't put a finger on. Sure, putting up some pictures or artwork is one way to make a space more interesting but the hall is such a tight squeeze that I'd rather keep it streamlined.

I read in one of my home decorating books that painting a darker color (or a vibrant interesting color) on the end wall of a long narrow space helps visually shorten and broaden the area. On our end wall, we had a nice mirror that I had bought a long time ago at one of those strange liquidator stores.  It looked good but didn't do enough to liven up the hall.
I recently moved the mirror to our garage entryway to help lighten up that dark corner and then looked for months for a similar mirror to put back in the hall but couldn't find one. I ended up buying a simple, unframed, beveled mirror that just looks too plain for such a plain space.

When I saw the Rustoleum Metallic Accents at the store, I figured that I could kill several birds at the same time by painting the hallway's end wall with some nice metallic paint: "framing" the new mirror, visually modifying the space and giving the area a bit of interest in one fell swoop!

Even with light from the bedrooms the hall is always dark
 and if all the doors are shut it's a cave
But what color? There were several that I really liked. It had to be a color that wasn't too dark, which was too bad because the color my husband and I liked the best was reddish brown "Warm Copper."

I first chose a light green but when I got it home I noticed the silvery hints in the color weren't what I wanted. I then chose "Soft Gold" which seemed like the right choice until I got it on the walls.
I don't usually tape off walls I'm painting but it was such a narrow space I ended up taping it all off. The instructions recommended rollers instead of brushes and they are right, it looks best rolled. The paint doesn't have very good coverage and so two coats were needed. In some spots I did three.
You can see how the metallic paint
shows every inconsistency in the wall's texture
Well, I don't know if I grabbed the wrong can of paint at the store but the color is not what I was expecting. "Soft Gold" is way darker and golder than I thought it would be (I guess that's why they sell those samples) and it's so metallic. I thought I'd like that effect but up close I noticed that it shows every flaw and texture variation in the wall, which isn't good because the hall's end wall has plenty of flaws.

I should have stopped there but then I painted some trees along the length of the two side walls.  I used painting tape and a level to make sure the trunks would be straight and that they would all be approx. the same height and width. 

The metallic paint catches the light giving them an interesting ombre' effect.  Still, I should have worked out what kind of tree I wanted to paint before I started.  Instead of beautiful airy saplings, I got something that looked stenciled and stiff (and suspiciously like something that would be stitched on a colonial embroidery sampler.)

So, the lessons I learned include the following: One, buy the paint sample first and try it before you buy the big can. Second, paint is always darker and more intense when massed on a wall versus the little paint chip. Thirdly, if your wall is flawed, metallic paint is probably not a good choice.  Oh and the last lesson, the little quart jars of paint are really tippy. (I knocked over the open jar twice and spilled at least half the paint on the tarp before I had even started painting.)
The one thing I thought turned out well was painting the light switch to match the accent wall. I spray-painted the switch and then I lightly sanded, brush-painted and textured the switchplate. Oh, and I should tell you that painting the end wall in a long room really does make the room seem wider and shorter. 

I guess I'll try to live with it for a while until my husband doesn't remember me buying the paint anymore.  Then, I'll either love the new look or I'll repaint the end wall with a cream color (non-metallic) a shade or two darker than the side walls, and either paint over the trees leaving the walls bare or try another image. Something more organic in form, like willows, grass, a swirling line of leaves or maybe just a wavy line.

Feel free to let me know what you think of the wall and trees and if I should undo what I did or keep it.